
The cradle carries the horn and can. Bolts connect it to the stand and let you adjust the telescope’s elevation. Build the cradle first, then assemble the stand underneath it.
Printable instructions (PDF): Cradle and stand.
On this page: Cradle materials and assembly, stand materials and assembly, and assembly demonstration.
Build the cradle
Build a wooden cradle to support the horn and can assembly. The cradle attaches to the telescope stand with two bolts.
Materials
| Quantity | Material and dimensions |
|---|---|
| 2 | 2 × 2 lumber, 20 inches long |
| 2 | 2 × 2 lumber, 9 5/8 inches long |
| 1 | 2 × 2 lumber, 6 11/16 inches long |
| 3 | 2 × 2 lumber, 9 inches long |
| 1 | 1/4-inch plywood, 7 × 8 inches |
| About 10 | 2 1/2-inch construction screws |
| As needed | 1-inch or 1 1/4-inch screws for the plywood |
| 2 | 3 1/2-inch-long 1/4-20 bolts |
| 2 | 1/4-20 wing nuts |
The eight lumber pieces can be cut from one 8-foot length of 2 × 2 lumber.
Assembly
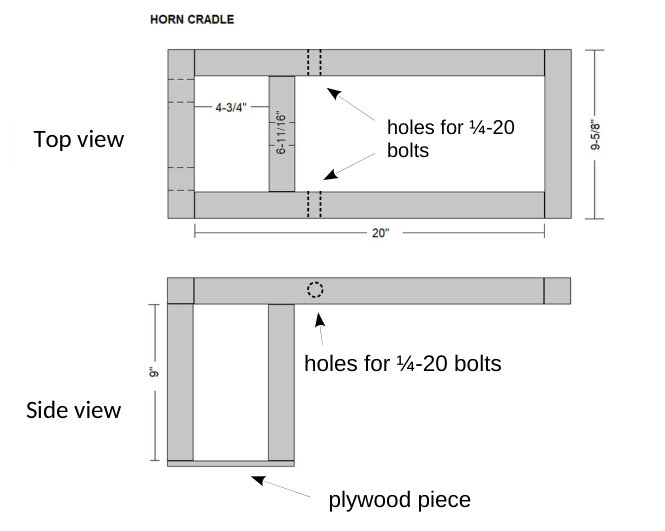
- Assemble the 20-inch, 6 11/16-inch, and 9 5/8-inch pieces into the rectangular frame shown below. Use 2 1/2-inch screws.
- Attach two 9-inch pieces below the corners at one end of the frame. Attach the third below the crossbar midpoint.
- Attach the plywood to the bottom of these three extensions. It supports the can and the amplifier cable.
- Drill 5/16-inch holes for the 1/4-20 bolts that connect the cradle to the stand.
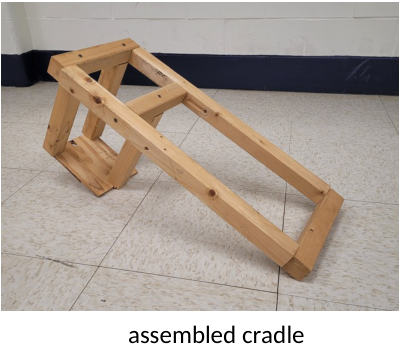
Cradle views
After assembling the horn, attach the amplifier to the can. Choose a hole or slot in the plywood for cable support.
Build the stand
Build a wooden stand for the horn telescope cradle. Notched base pieces allow the stand to come apart for transport.
Materials
| Quantity | Part |
|---|---|
| 4 | 2 × 4 boards, 3 feet long |
| 2 | 2 × 4 boards, 2 feet long |
| 2 | 2 × 4 braces, 2 feet long, with a 45° cut at one end |
| As needed | 2 1/2-inch construction screws |
| 2 each | 3 1/2-inch-long 1/4-20 bolts, wing nuts, and washers |
1 Cut the base notches
Cut matching saddle notches in the base boards, as shown below. Each notch is 1 1/2 inches wide and 1 3/4 inches deep. Fit the notches together to form the base.
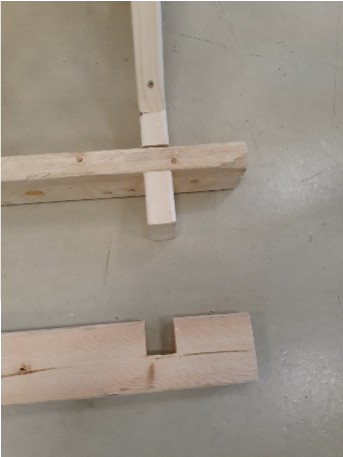
Figure 1. The matching notches let the base boards fit together.
Assemble the stand
2 Attach the uprights
Use 2 1/2-inch screws to join the four 3-foot boards in two right-angle pairs. Position each joint 10 1/2 inches from one end, as shown in the finished stand.
3 Add the braces
Attach the two 2-foot braces to the 3-foot boards. Use the 45° ends to support the right-angle joints, as shown in Figure 2.
4 Attach the cradle
Connect the cradle to the stand with the 1/4-20 bolts, washers, and wing nuts. The completed telescope is shown in Figure 3.
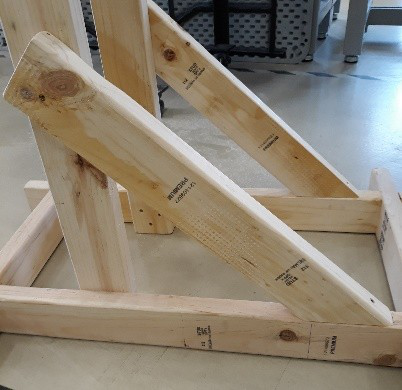
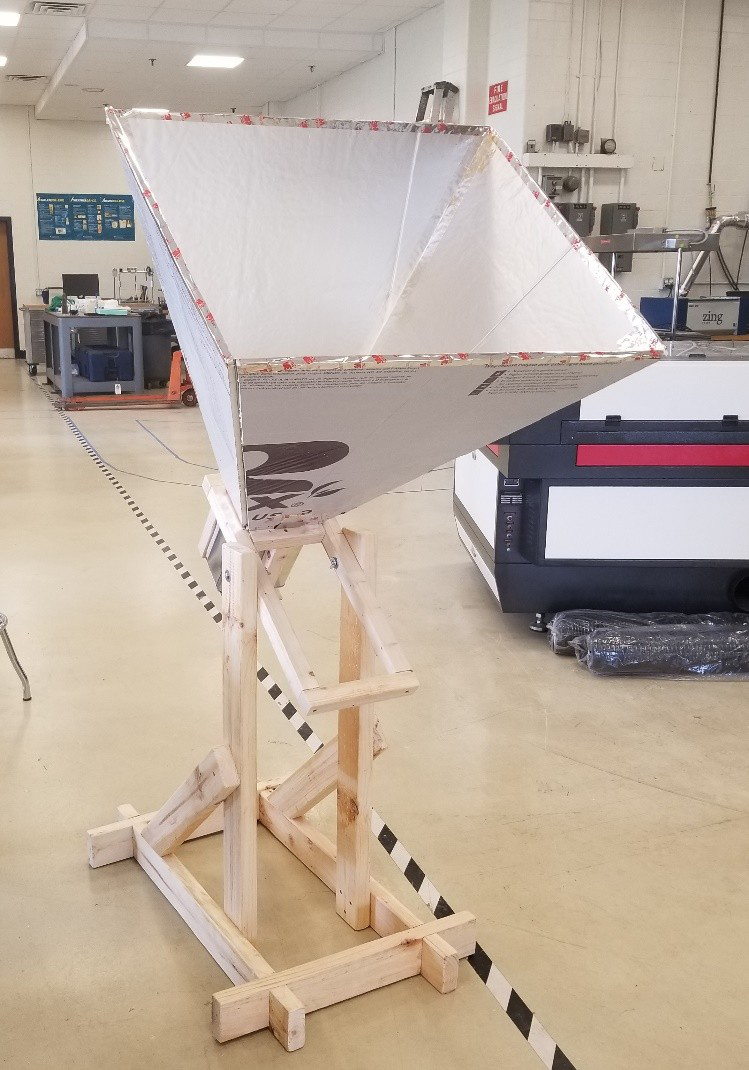
Figure 2. Braced frame (first photograph). Figure 3. Stand with the horn telescope attached (second photograph).
Related construction guide
Horn telescope cradle assembly
Assembly demonstration
Watch how the horn, can and antenna, cradle, and stand fit together.